Installation and Upgrade Guide
Overview
This document describes how to install and upgrade a Totalview installation
The installation kit for Totalview installs the Totalview server, the Totalview Admin module, the Totalview clients (client, switchboard and receptionist), the Totalview Web reports and the connectors.
The installation kit does not install any connector services. The connector services are configured and installed using the Totalview Admin module.
Previous Totalview versions can be upgraded by using the installation kit.
The installation kit upgrades the Totalview server, the Totalview admin and the Totalview clients. The documentation and connector files are also updated.
The installations kit does not upgrade the installed connectors. The installed connectors are upgraded manually from the connectors view in Totalview Administration. See section 4. Upgrading the connectors.
The installation kit is available on the partner net https://www.total-view.com
Totalview installation kit
The Totalview installation kit handles the installation of the Totalview solution consisting of the following parts:
The Totalview server and clients (admin, client, switchboard and receptionist)
Initial database and an optional demo database
The various connector files in the InstallFiles folder.
Web reports and applications
SQL Server 2008 or never must be installed before installing Totalview
You must be logged in with Administrator rights to install the Totalview solution.
The installation of the web reports and applications requires that an IIS version 7.0 or higher is installed.
The web reports and applications require Microsoft .NET Framework 4.5
Specific upgrade notes
Upgrade from version |
Upgrade to version |
Comments |
Any |
Any |
The TotalviewDB update script might fail in special cases, when the database has been altered manually outside of the Totalview update scripts. When this happens the update error is displayed in the TotalviewInstaller/Update program. If possible then fix the problem described and re-run the update script using the “Try again” button. If the problem continues call Totalview support. |
Totalview 2018 or older |
Totalview 2018 SP1 or newer. |
If the BroadWorks connector is installed then stop and unregister the connector prior to upgrading. After the upgrade the BroadWorks connector can be updated, registered and started as normal.If you fail to unregister the connector prior to upgrading, then the connector service can be removed manually as it is no longer used by Totalview. |
Installing Totalview
Installing the Totalview files
Log onto the Totalview computer with a user that has Administrator rights.
Download and unzip the installation kit from the Totalview partner net.
To start the installation, run TotalviewInstaller.exe
The installation requires that the .NET 4.5 Framework is installed.
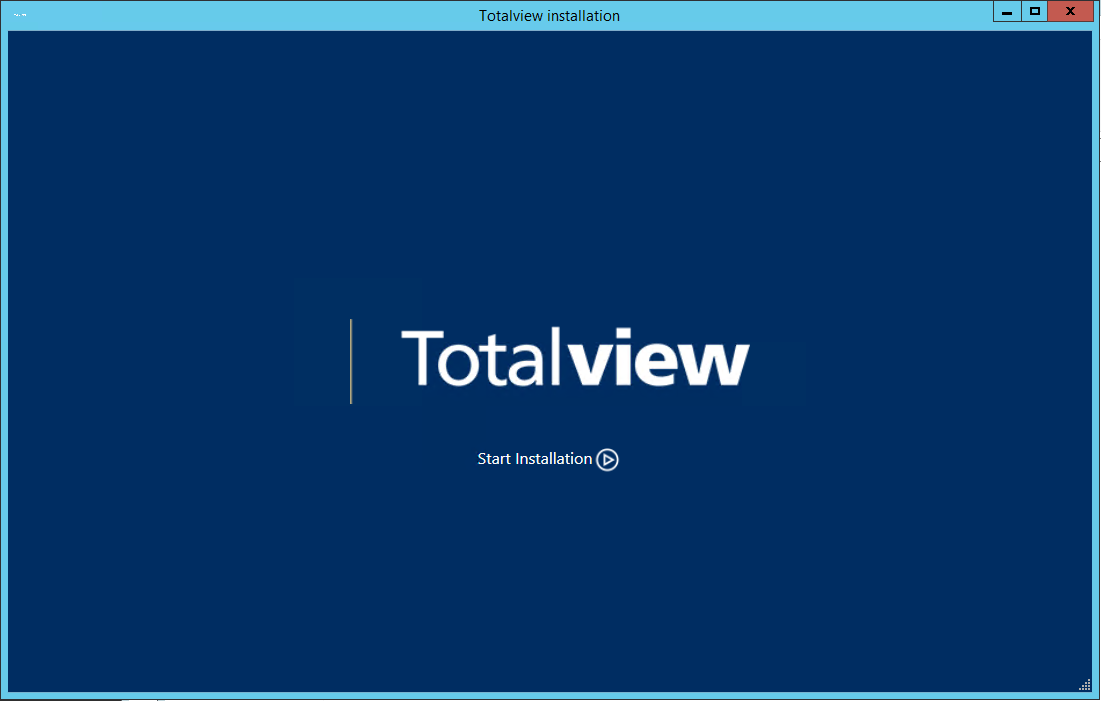
Click the Start Installation button to get started
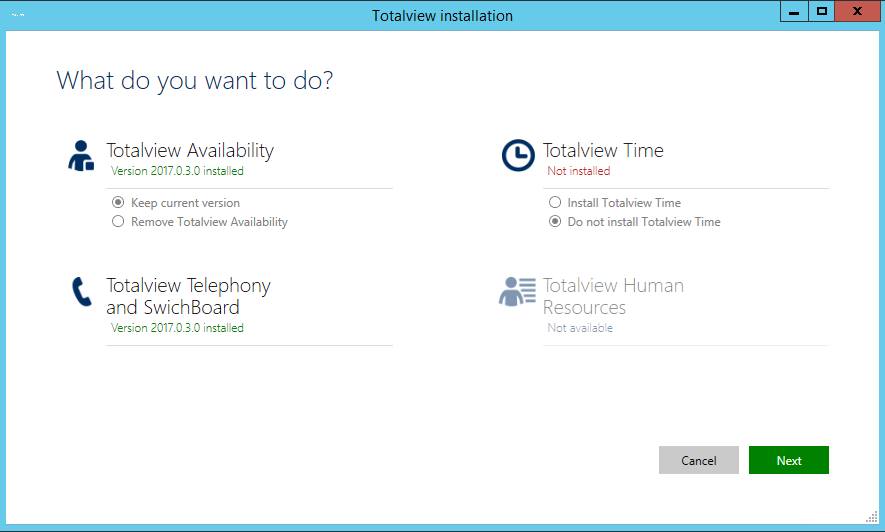
Select the features you want to install and click Next
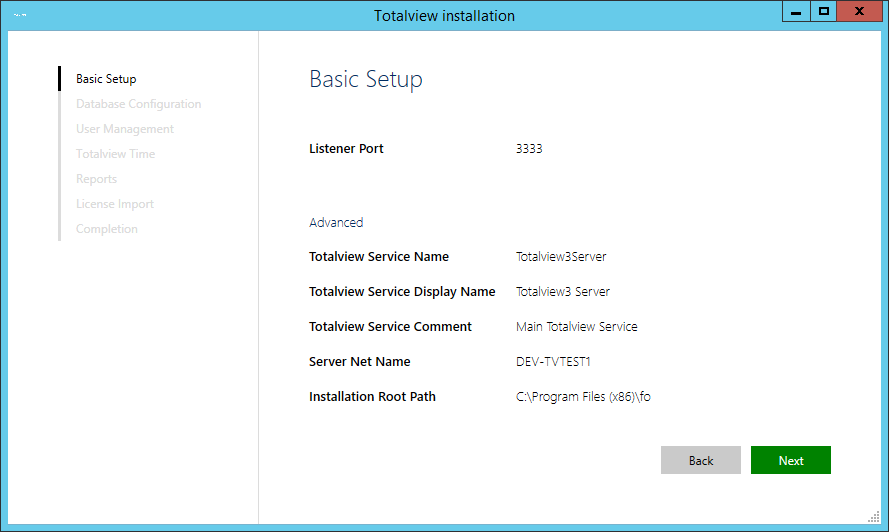
Select default listener port. Default is 3333. Select Next
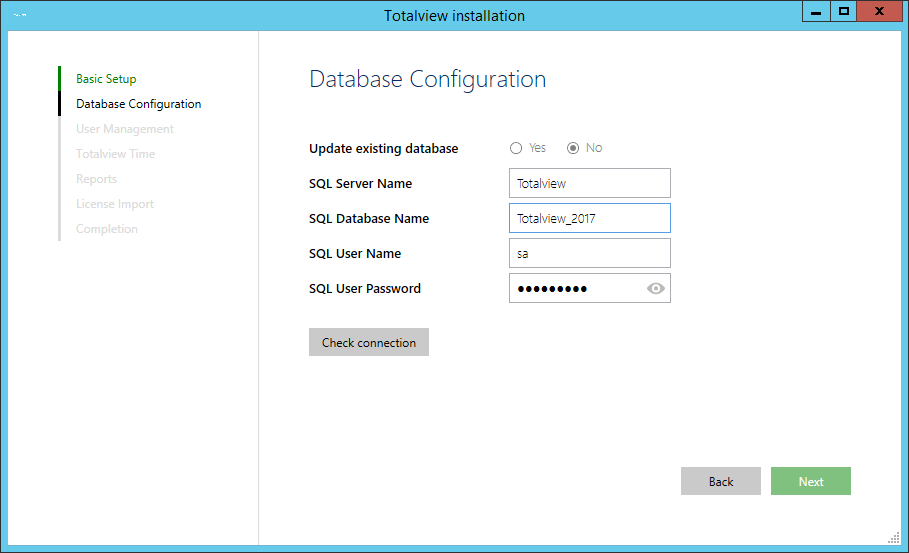
Fill in SQL Server information and choose if you want to install a database with demo data and click Next
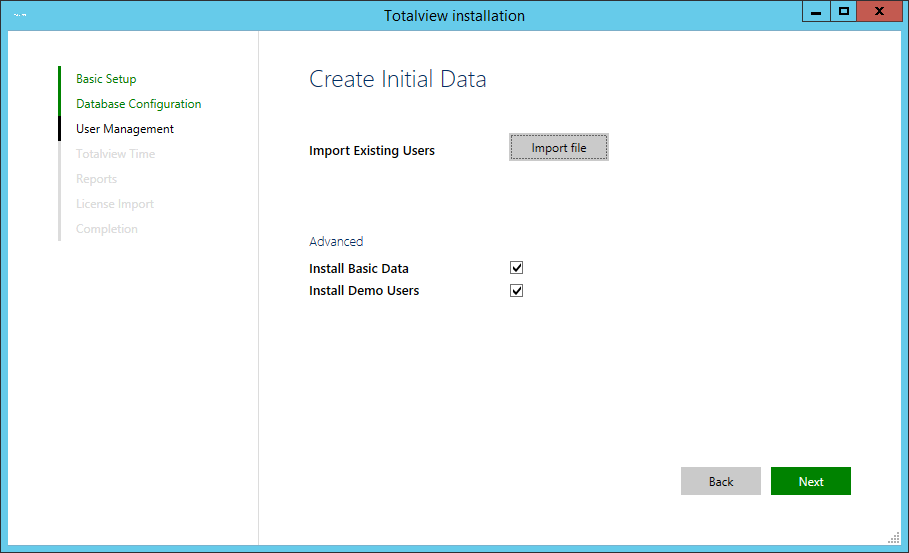
Select if you want to install Basic Data and Demo users
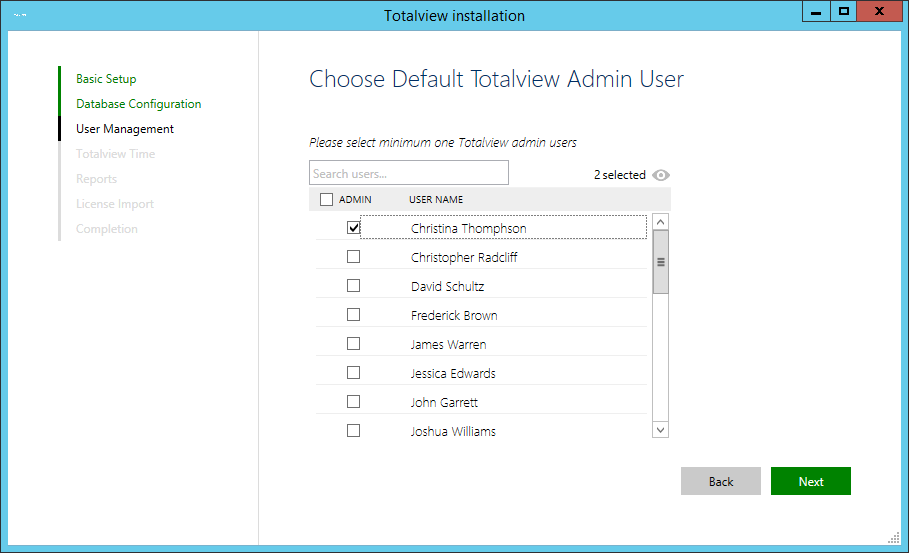
Choose Default Totalview Admin user
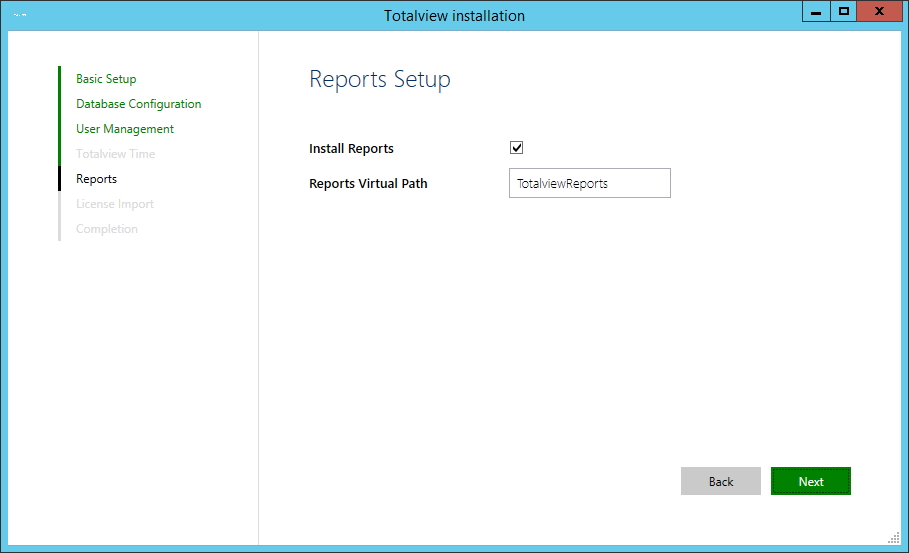
Choose a name for the Totalview Report
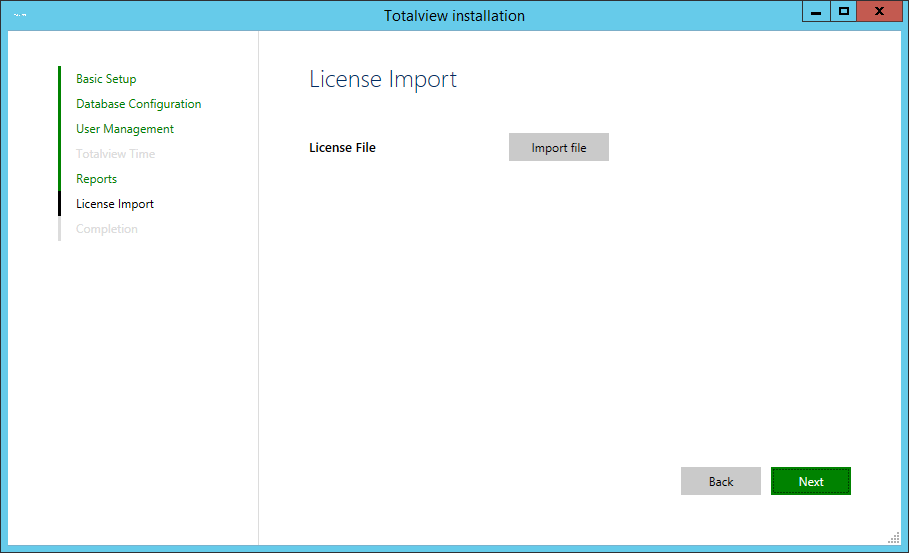
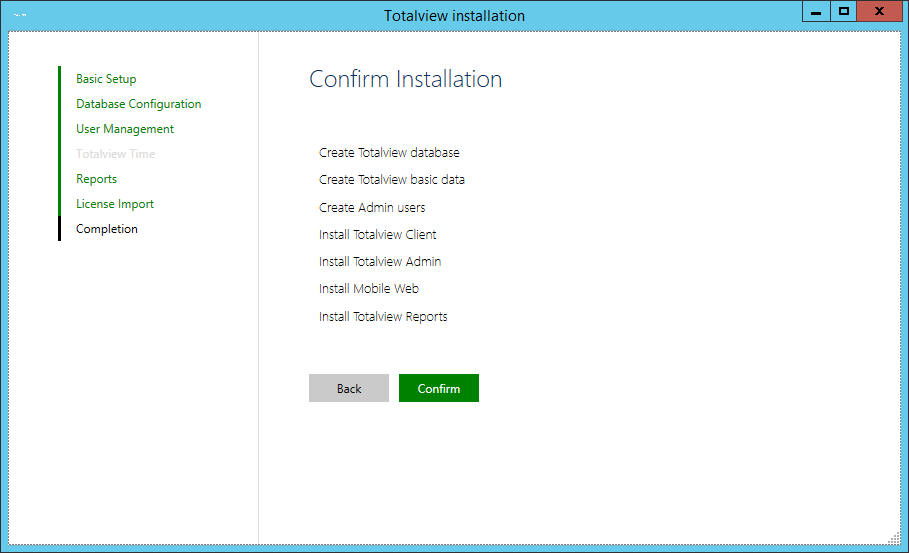
In the installation process, you can import a license file
Review the settings and click Confirm and Totalview will install on the server.
Shares and shortcuts
If the registration of the service was successful, then shares and shortcuts are created automatically.
Installing web reports and web applications
The web reports and web applications will be installed and configured automatically if the above requirements are met.
If the web reports are installed on a different server then the Totalview server service, the installation will ask for a connection to the Totalview database.
The installation is now completed!
Modifying the installation
It is possible to modify the installation by running the TotalviewInstaller.exe again.
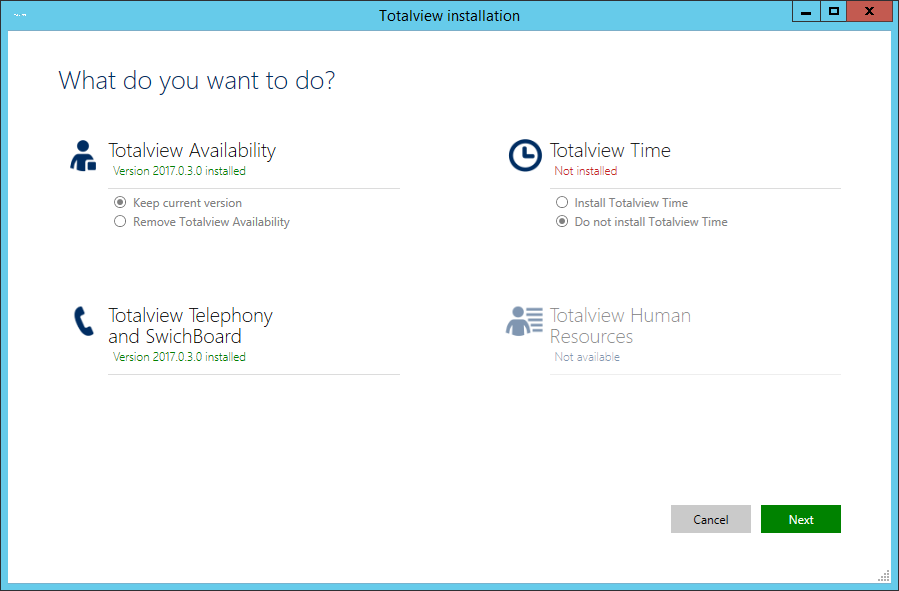
Select Keep current version to install features or to remove installed features
During uninstall, installed files and folders will be removed and the Totalview service will be unregistered.
If the installation is unable to remove the folder where Totalview is installed, then the folder can be deleted manually.
Created Totalview databases will not be removed.
Totalview upgrade
Totalview can be upgraded from previous installed Totalview versions.
This section describes the upgrade from versions 3.3.2 or newer.
The upgrade procedure updates the following modules in the Totalview solution:
Existing connectors (HiPath, SMS, and Exchange) are not updated automatically and must be updated manually after the upgrade is done. See section 4. Upgrading the connectors.
You must be logged in with Administrator rights to upgrade the Totalview solution.
Upgrading Totalview
Log onto the Totalview computer with a user that has Administrator rights.
To start the upgrade, run TotalviewInstaller.exe located in the downloaded zip file.
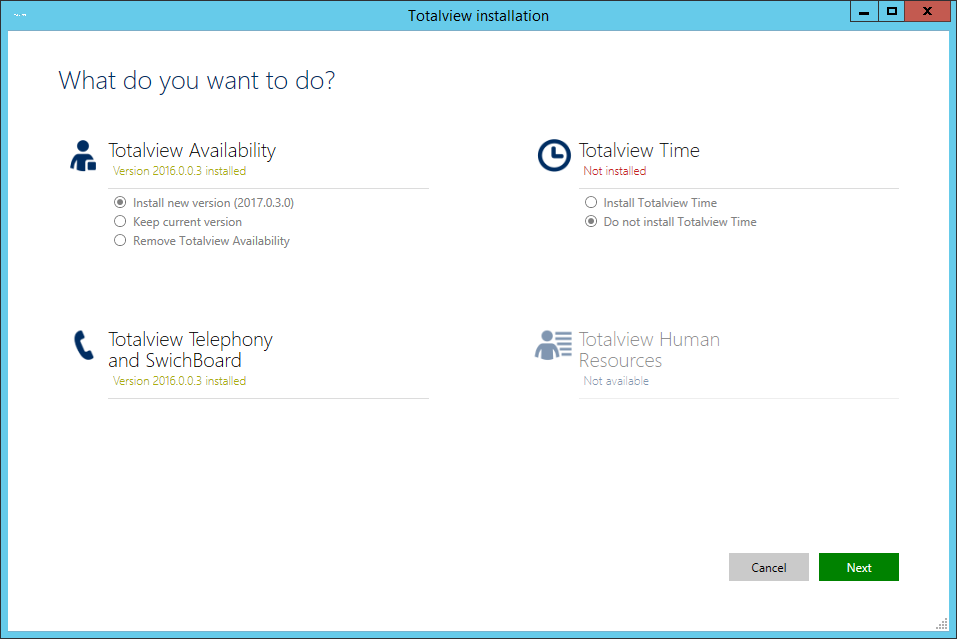 Select Install new version to upgrade to the newest version.If the upgrade is successful, you will see a message on the screen:
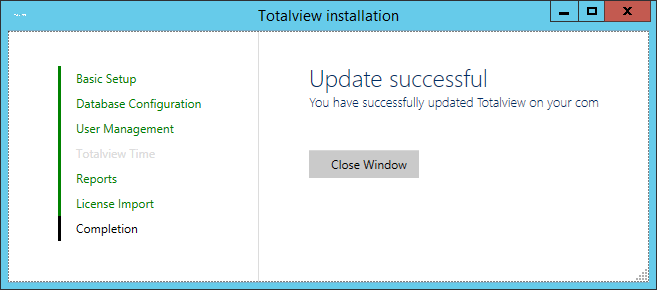
When upgrading the Totalview solution, clients or connectors must NOT be connected to the Totalview server or the upgrade will fail. Close all clients and all connectors from the Totalview Administration module.
Upgrading the connectors
Existing connectors are not updated automatically and must be updated manually.
Make sure all the connector services are stopped.Use the Totalview Admin module or MS Service Control manager to stop the services. The services are named Totalview<Type> where <Type> can be e.g. HiPath, SMS, Lotus Notes or Exchange.
Go to the Overview tab in the connectors view in Totalview Administration. In the column Version you can see the installed version, and in the column Newest version you can see the appropriate version.
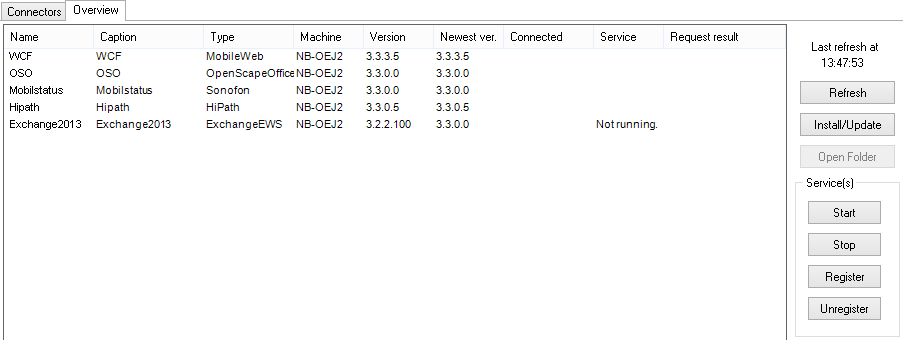
If the installed version is not according to the newest version, then you upgrade your connector by selecting the connector and press the button Install/Update. Upgrade all installed connectors this way.
Start all the connector services.Use the Totalview Admin module or MS Service Control manager to start the services. The services are named Totalview<Type> where <type> can be HiPath, SMS or Exchange.
The Totalview folder structure
This section describes what folders are created in a typical Totalview solution installation and what files are located in the folders.
There also is a description of the folders created when connectors are registered in the Admin module.
The Totalview standard folders
Admin |
Contains the Totalview Administration module and a shortcut to start the Admin. |
Client |
Contains the Totalview Client module and a shortcut to start the client, switchboard and receptionist. The same executable is used for all three types of clients. |
InstallFiles |
Contains the newest version of the various connector files. The upgrade procedure copies the newest connector files to this folder. Installed connectors must be updated by copying the files from this folder into the connector folder. See section 4. Upgrading the connectors |
Misc |
Contains various utilities and test tools. |
Server |
Contains the Totalview server executable and the serverconfig.xml file. The serverconfig.xml file holds the settings for the hard coded login and for the Totalview database used. |
The Totalview connector folders
When installing a connector using the Totalview Administration module, the connectors are placed in separate folder based on the connector type.
Each connector is placed in a separate folder placed under the connector type folder, i.e. creating a HiPath connector with the name Formula will result in the creation of the folder HiPath_Formula placed in the type folder HiPath
HiPath |
Contains a folder for each type of HiPath connectors created. Each created folder contains the Totalview3HiPath executable. |
Exchange |
Contains a folder for each type of Exchange connectors created. Each created folder contains the files belonging to the Exchange connector. |
SMS |
Contains a folder for each type of SMS connectors created. Each created folder contains the Totalview3SMS executable. |
WCF |
Contains a folder for each type of web service connectors created. Each created folder contains the Totalview3WCF executable. |
Server |
Contains the Totalview server executable and the serverconfig.xml file. The serverconfig.xml file holds the settings for the hard coded login and for the Totalview database used. |
The shortcut settings
This section describes the switches that can be added to client shortcuts. Some of the shortcuts are optional while others, like the server location, are mandatory.
<exefile> can be Totalview3Client.exe or Totalview3Admin.exe.
The server location. /s:servername:port
This is a mandatory switch and specifies the location of the TV3 server and the port number used by the TV3 server.
<path><exefile> /s:TV3server:3333
The username, password switch /u:username /p:password
When used, the login screen is suppressed and login is using the defined username and password.
<path><exefile> /s:TV3server:3333 /u:tt /p:ttpwd
The windows login /w
When used the login screen is suppressed and login is using the user’s windows login.
<path><exefile> /s:TV3server:3333 /w
The client specifier /m:
Defines the client type used.
/m:N is normal client
/m:R is receptionist
/m:S is switchboard
/m:T is doorwayclient
If no /m switch is specified the normal client is loaded.
<path>Totalview3Client.exe /s:TV3server:3333 /m:S
The device specifier /d:
Only used with switchboard. When used the specified device is defined as listening device for the Swichboard. When not specified the users local number will be used as listening device.
The RESETLAYOUT specifier
If the client is started with parameter: “Resetlayout” (not /ResetLayout or – ResetLayout) the layout of the client will not be read from the server. This can be used if the client for some reason has invalid layout e.g. not visible or parts of the client have disappeared.
The /NOIMAGES specifier
If the client is started with parameter: “/NOIMAGES” images of users will not be loaded
The computer name specifier /c:name
Used with the various clients. When used, all client settings are saved and loaded using the name value. This way a user can use the same client settings on different machines. This is especially useful on terminal server installations, when the user is logging on an arbitrary machine.
E.g. using the /c:totalview3 switch in the shortcut will load and save the same setting for the user regardless of the machine used.