Google Calendar Settings
Overview
The synchronization between the Google Calendar and Totalview is based on a query user with access to the Google users’ calendar folder. The Totalview GoogleCalendar connector logs on to the Google Calendar service using the query user, and uses the Google Calendar API to query, create, update and delete appointments on behalf of the Google users.
This document describes how to create the query user and how to test the query user and the query user access to other users’ calendar folders.
The Totalview GoogleCalendar connector uses OAuth 2.0 for Server to Server Applications. This requires a service account with domain-wide authority to the Google Calendar API. The Totalview GoogleCalendar connector calls Google APIs on behalf of the service account to get access to users’ calendars.
See also
https://developers.google.com/identity/protocols/OAuth2ServiceAccount#delegatingauthority
https://developers.google.com/identity/protocols/OAuth2ServiceAccount
The following steps are required to setup access to users’ calendars.
Register the Totalview GoogleCalendar as a Google application project.
Enable the Google Calendar API for the project.
Add a service account with credential access to the project.
Enable G Suite Domain-wide Delegation
Create and configure the query user
Register the Totalview GoogleCalendar project
The project acts as a reference to the required functionality which the Totalview GoogleCalendar uses to get access to the users’ calendars.
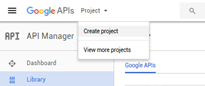
1: Login to the Google developer console: https://console.developers.google.com
2: Select Project \ Create project
3: Select New Project, enter a project name and press Create
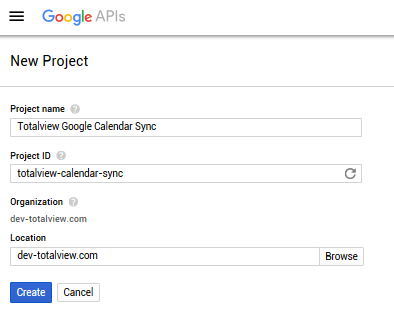
The Project ID is subsequently used in the web references, i.e. https://console.developers.google.com/apis/dashboard?project=totalview-calendar-sync
Enable the Google Calendar API
1: Login to the developer console library: https://console.developers.google.com/apis/library?project=totalview-calendar-sync
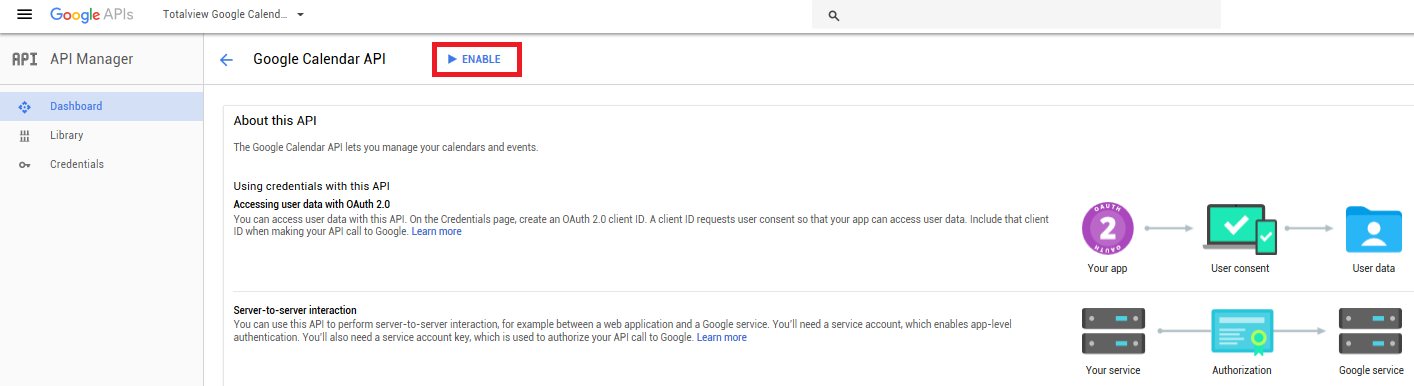
2: Find the Google Calendar API
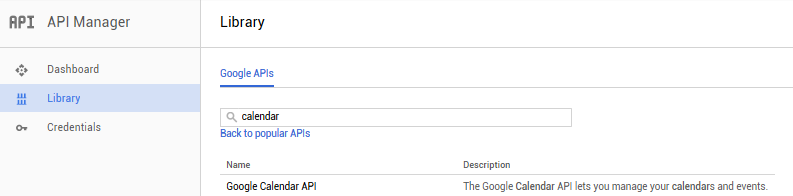
3: Select the Google Calendar API (Press on the Name in the list)
4: Select Enable
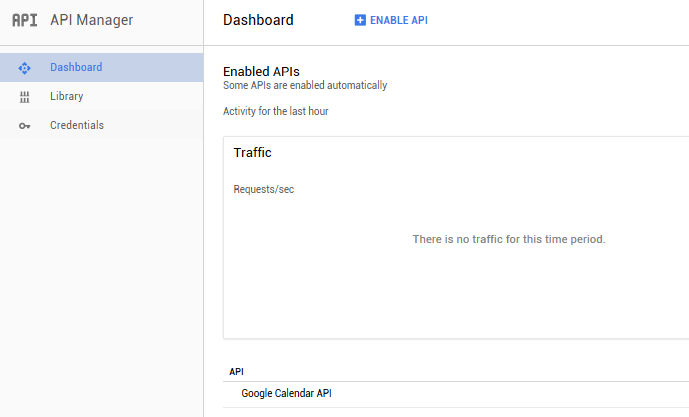
The dashboard will now display the Google Calendar API in the Enabled APIs list:
Add credentials to the project
Complete the following steps to add credentials:
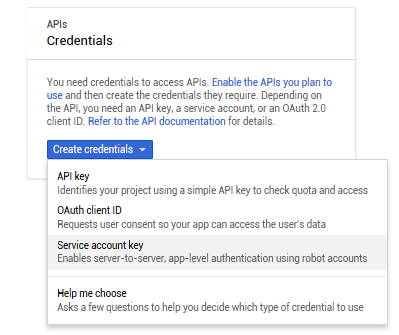
1: Open the developer console security: https://console.developers.google.com/apis/credentials?project=totalview-calendar-sync
2: Select Service account key
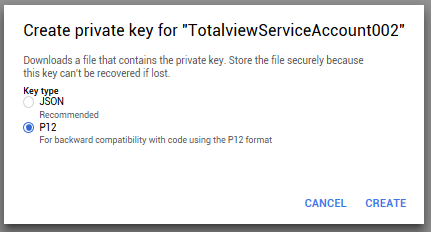
3: Enter a service account name and ensure that the key type is p12:
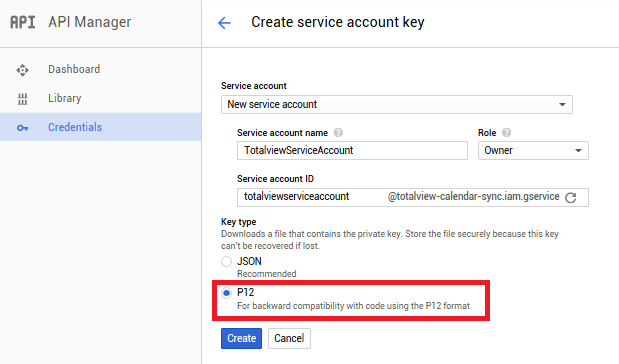
4: Set the Role to Project.Owner.
5: Press Create.
6: This will create the account and download a P12 key file, also it will give you a password which is “notasecret”. Since the password is public it is important that you store the keyfile somewhere safe.
The Service Account ID, P12 key file and key file password are used when setting up the Totalview GoogleCalendar
Enable G Suite Domain-wide Delegation / Get a Client ID
To enable G Suite Domain-wide Delegation:
1: Open developer console service accounts: https://console.developers.google.com/iam-admin/serviceaccounts/project?project=totalview-calendar-sync
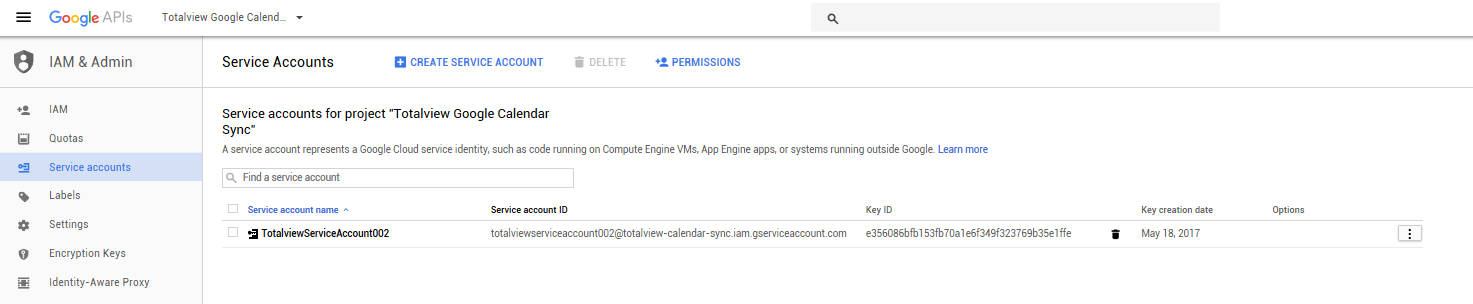
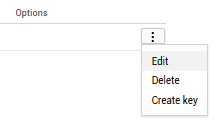
2: Press the button under options and select Edit:
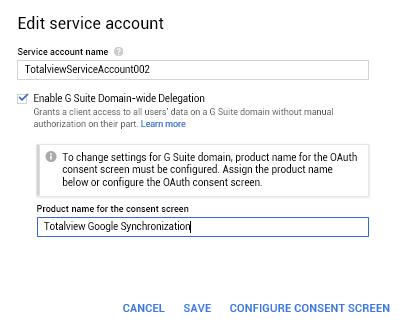
3: Check Enable G Suite Domain-wide Delegation and enter a product name for the consent screen, and save.
4: When the account is enabled for domain wide delegation it will also get a Client Id
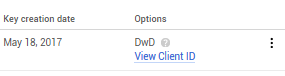
5: View Client ID and copy it, it will be used in the next step.
Creation and configuration of the query user
Complete the following steps to setup the query:
1: Login to the Google admin console: https://admin.google.com/
2: Select Security from the list of controls. If you don’t see Security listed, select More controls from the gray bar at the bottom of the page, then select Security from the list of controls. If you can’t see the controls, make sure you’re signed in as an administrator for the domain.
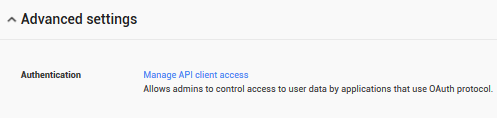
3: Select Show more and then Advanced settings from the list of options.

4: Select Manage API client access in the Authentication section.
5: In the Client Name field enter the service account’s Client ID. You can find your service account’s client ID in the Service accounts page. In the One or More API Scopes field enter the list of scopes that your application should be granted access to: https://www.googleapis.com/auth/calendar.
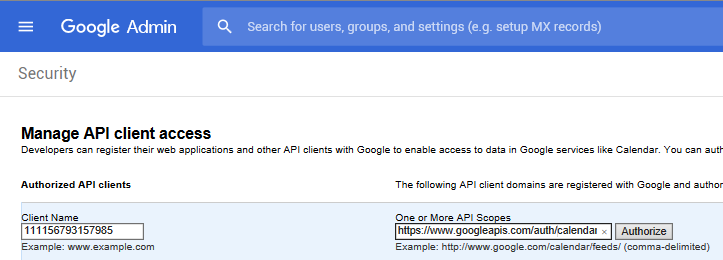
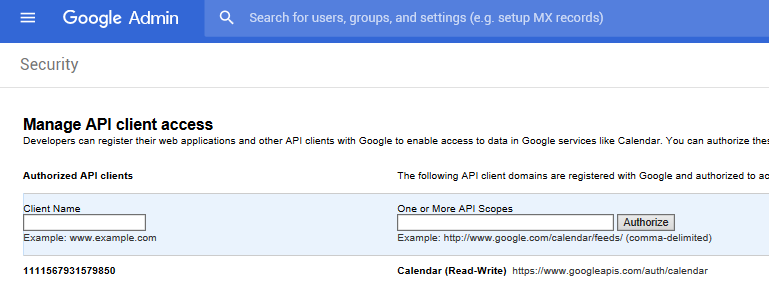
6: Click Authorize – the client will be shown on the list below.
Testing the query user
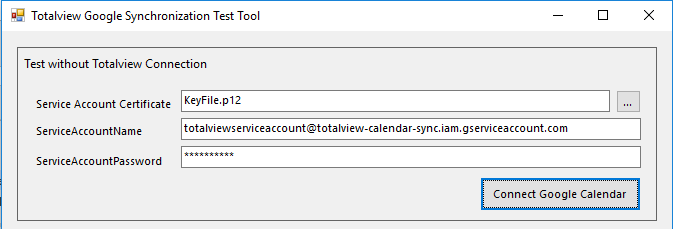
Use the Totalview GoogleCalendar test tool to test the query user’s access to Google Calendar.
The test tool is located in the <InstallDir>\InstallFiles\GoogleCalendar folder.
Add the Service Account ID, P12 key file and key file password and select “Connect Google Calendar”.
The setup parameters can also be added to the test tool application config file.
Add a current user and some polling users to test.
Test that appointments can be received from the polling users, using the “Get all future appointments”.
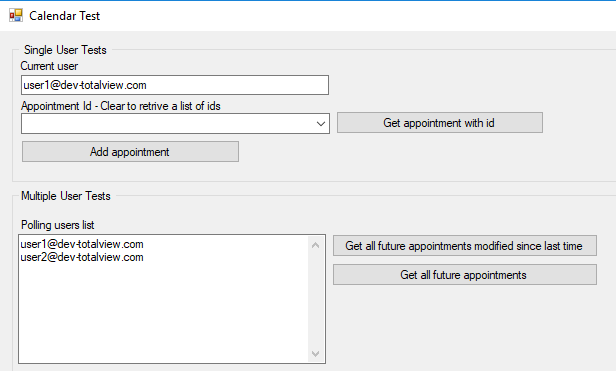
Test that an appointment can be created for the current user by using the “Add appointment”.
Common errors
If you get an error: “invalid_grant” or “Invalid JWT Signature”. There might be something wrong with the key file (the .p12 file). Try creating a new by going to https://console.developers.google.com/iam-admin/serviceaccounts/project?project=totalview-calendar-sync select options \ create key
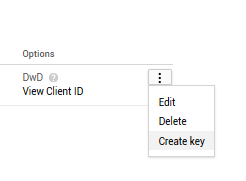
Select p12 and press CREATE